 Mattevia
How to Remove the Background from an iPhone HEIC Photo
Turn a supported HEIC photo into a transparent PNG. Choose the right original, check the cutout, and understand export size, color, and common upload problems.
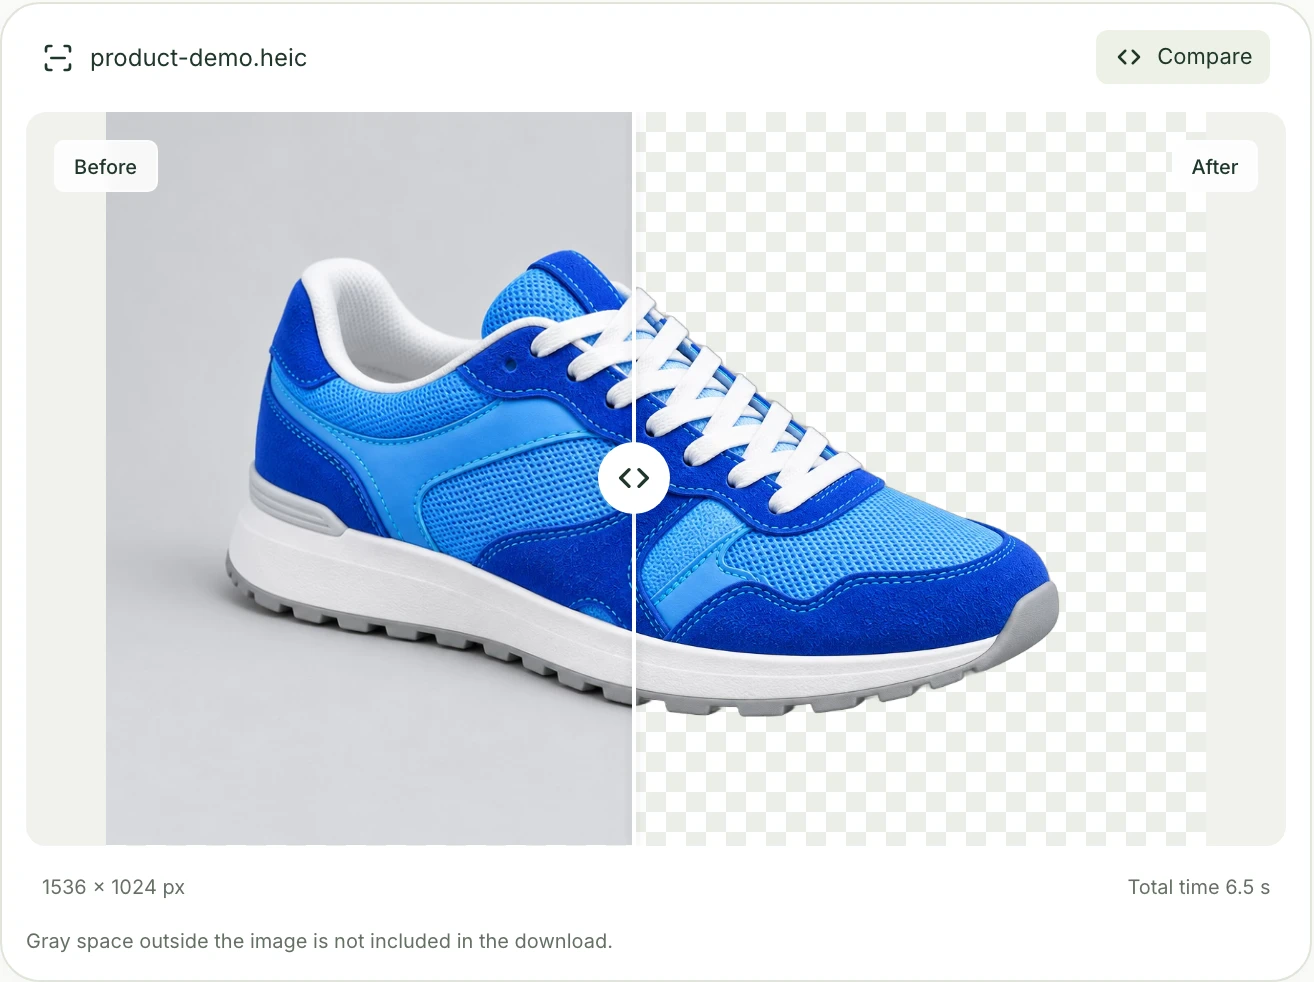
You have a photo on your iPhone and want to use just the subject: a pair of shoes for a listing, a portrait for a slide, or a pet for a sticker. The file ends in .heic, and the design you are making needs a transparent PNG.
You can upload a supported HEIC photo directly to Mattevia’s HEIC background remover. There is no need to convert it to JPG first. After processing, check the outline, select a transparent background, and download PNG.
One distinction matters before you start: removing a background changes the picture; converting a file changes its format. If you want to keep the entire photo and only make it compatible with another app, use a regular image converter instead.
Start with the right photo
A sharp subject, good lighting, and some contrast with the surroundings give you more useful material to work with. Keep the whole subject in frame, including shoelaces, fingertips, or the tips of an animal’s ears. Background removal cannot recover parts that were cropped out or restore detail lost to blur.
Use the original photo where possible. A screenshot captures the view on your screen, rather than preserving the original image file. A copy saved from a chat may have different dimensions or compression.
Make sure you actually have the HEIC file
Apple notes that sharing or transferring photos can automatically change their format for compatibility. For USB transfers, its Keep Originals setting prevents that conversion. See Apple’s HEIF and HEVC guidance for the current instructions.
If your photo is already in Photos on a Mac, select it and choose File → Export → Export Unmodified Original. This exports the original file, so it will not include subsequent edits. Apple’s Photos export guide explains the available options. If you need your edited version instead, export that version in a supported still-image format.
Check the actual file you intend to upload. If your transfer produced a JPG, Mattevia accepts that too; converting it back to HEIC would add an unnecessary step.
Check these limits
Mattevia accepts a supported single-image HEIC or HEIF file within all of these limits:
- 10 MiB per upload (10,485,760 bytes).
- 60 megapixels in the input image.
- 16,384 pixels on either side.
The Live Photo video component, RAW/DNG files, and multi-image sequences are not supported. For an unsupported photo, export one still JPG or PNG from your photo app and check that copy before uploading.
1. Upload the photo
Open the HEIC background remover, choose Upload image, and select your file. On a desktop, you can also drag the file into the upload area. Wait for processing to finish before judging the result.
The service decodes the HEIC image and applies its stored orientation. It then supplies a browser-friendly preview, so your browser does not need to display the original HEIC file itself.
Choose Upload image and select the HEIC file from your device.
A reproducible example
For this guide, we uploaded a 197,000-byte HEIC example to the live tool and downloaded a transparent PNG. Both the input and output were 1,536 × 1,024 pixels. We checked the downloaded file for transparent pixels, rather than relying only on the checkerboard preview.
You can download the same HEIC example to follow along. This small example demonstrates the upload-to-download workflow; it does not establish how every iPhone photo or a 48 MP file will turn out.

2. Check more than the middle of the subject
Once the result appears, use Compare to inspect the original and the cutout. Start with orientation and composition: is the subject upright, and is everything you need still there?
Then inspect the places where background removal is most likely to need attention:
- Fine edges: loose hair, fur, threads, and shoelaces.
- Gaps: spaces between fingers, inside handles, or beneath a shoe.
- Similar colors: a white sleeve against a pale wall, for example.
- Reflective or translucent areas: glass, glossy packaging, and thin fabric.
Temporarily try both a light and a dark background. A pale fringe can disappear on white but become obvious on a dark slide. A dark remnant can do the reverse. Look for color from the old background clinging to the outline, as well as pieces of the subject that have become transparent.
If an edge is wrong, switching from PNG to WebP will not repair it. Try a sharper original with better separation, or finish the cutout in an editor with manual masking controls. For a product listing, inspect labels and small details at the size customers will actually see.
3. Download a transparent PNG
Select Transparent as the background and PNG as the download format. Both choices matter: a PNG can contain an opaque background, so choosing the file extension alone does not create transparency.
Choose Original size when you want to keep the processed image’s proportions. Choose the square canvas only if your destination needs it; the added space becomes part of the exported canvas. Check the displayed output size before downloading.
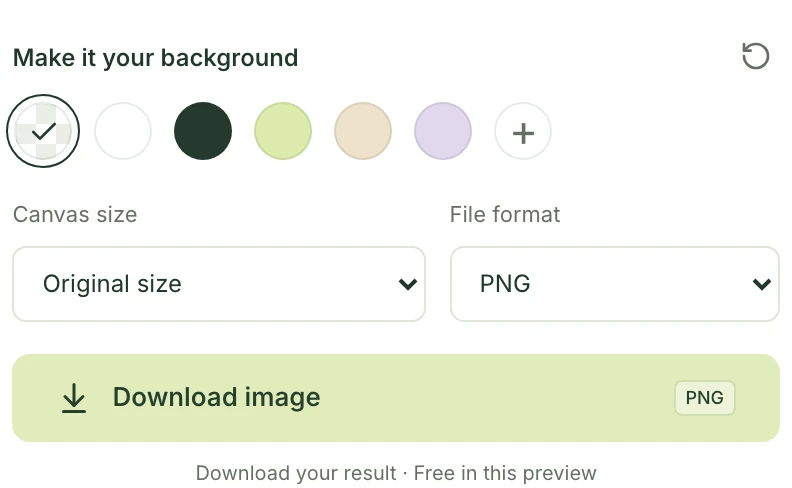
Check the background, format, and canvas before saving the final file.
Open the downloaded PNG in the app where you plan to use it. Place it over a colored shape or background. The color should show through outside the subject. A checkerboard is a common transparency preview, but the preview alone is not proof: a picture can have a checkerboard baked into its pixels.
If the background still looks wrong, follow the PNG transparency checks before processing the image again.
WebP is another option for transparency when your destination supports it. JPG does not preserve transparent pixels; choose a solid background when you need a finished JPG.
What happens to size, color, and photo metadata?
An accepted 48 MP photo will not remain 48 MP. Mattevia processes images at up to 20 MP and may reduce them further to fit the result-file limit. The page shows original and processed dimensions. Those numbers describe the image size, not a promise that every fine detail survived the cutout.
For example, a 6,000 × 8,000 photo contains 48 million pixels. Reducing its dimensions proportionally keeps the shape of the composition, but leaves fewer pixels for small details. Review the downloaded result at your intended size before using it for a large print.
A small browser preview is also different from the exported image. Check the download rather than estimating output quality from the preview alone.
The export does not copy EXIF or GPS metadata. Processing does not promise to preserve HDR appearance or the original Display P3 color gamut. For color-sensitive product photography, compare the downloaded image with the source in your intended workflow and keep the original file separately.
When something goes wrong
“The image could not be read”
Open the source in your photo app first. Export a fresh still JPG or PNG and upload that copy. Changing .heic to .jpg in the filename does not convert the file. If you received several files from a Live Photo export, choose the still image, not the video.
The upload is too large
Check both file size and pixel dimensions. A file can fit under the byte limit and still exceed a dimension limit. Export a smaller copy while preserving its proportions. Cropping away unnecessary surroundings can help, but leave room around the entire subject.
The result looks rotated or different in color
Stored orientation can swap width and height when applied. Confirm that the actual picture is upright. If orientation or color still looks wrong, export a standard still image from the source app and compare that version before retrying.
The phone struggles with preview or download
Try a smaller source image or continue on a desktop. Large images require memory beyond their compressed file size. If processing reports that the service is busy, wait before retrying rather than submitting the same image repeatedly.
The downloaded image has a white background
Check that Transparent and PNG were both selected. Then test the file over a colored background in your design app: some viewers display transparent pixels as white. If white remains part of the image, return to the export settings and download again.
Put the cutout to use
Keep the original HEIC and the finished PNG as separate files. That gives you a reusable cutout without losing the source if you later want different framing or need to refine an edge.